Creating a geographic routing plan
For Lumen® Toll Free Service, use geographic routing (sometimes referred to as geo routing) in Lumen Connect to automatically redirect inbound calls based on where the caller is calling from. For example, you might use this feature if you have sales offices all over the country and want to direct customers to offices that are located physically closest to them. You can update the routing plan as your business needs change.
To route call traffic based on location:
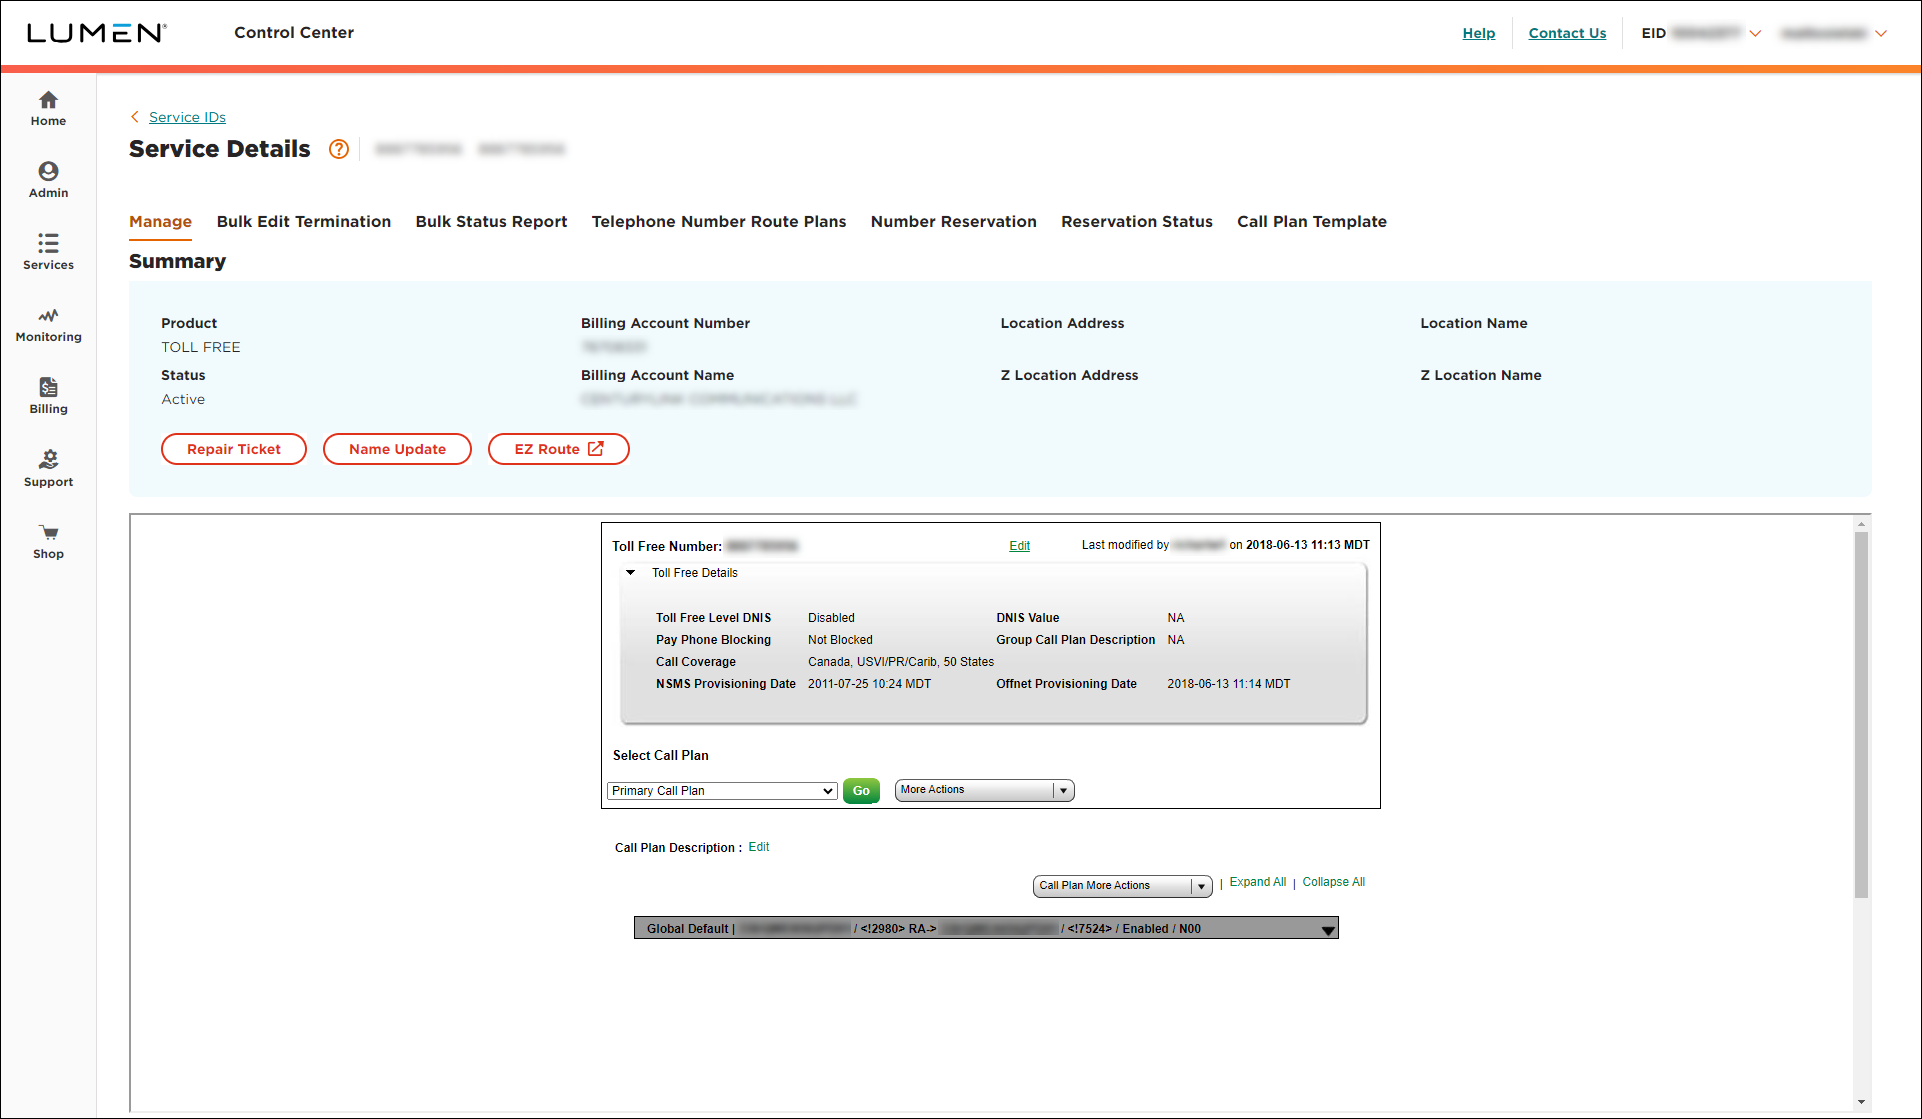
- In the Services widget on the homepage, select Toll Free from the Find by Product or Service Tool list.
Lumen Connect shows all Toll Free services on the enterprise ID.
- Search for the service you want to work with. When you find the service you want to work with, click the hyperlinked service ID or click the icon (in the Actions column), then click View Details.
Lumen Connect shows details for the toll-free service you selected.

- From the Call Plan More Actions list, select Edit Call Plan.
- On the right of the global default (dark gray) bar, click the down arrow, then click Add New Feature.
- In the popup window, from the Select Feature list, select Geographic Routing, then click Submit.
- If the Confirm Feature ADD/Delete window appears, click Accept.
- In the Default Routing Type section, select the radio button for the routing type you want to use for the feature.
- From the Time Zone list, select a time zone for the routing plan.
- Click Add Rule.
From here, you're creating a rule to tell the system what to do when someone calls a certain phone number. For example, when customers call your toll‑free number, they get routed to area codes in Colorado.
- Depending on what kind of number you want to route, in the Terminating Route Type section, do one of the following:
- To add a dedicated trunk:
- Select the DED radio button.
- From the Primary Trunk list, select the trunk.
- Select the DED radio button.
- To add a switched ANI:
- Select the SWI radio button.
- From the ANI list, select the terminating route. (If you don't see the trunk/ANI you need, click the ADD ANI TO THE LIST button, fill in the fields, click Add, then select the number from the list.)
- Select the SWI radio button.
- To add a dedicated trunk:
Note: If you give the ANI a description, describe it so you and your colleagues will remember it. If you leave the description blank, the phone number will show in the list.
- In the Default Routing Type section, do one of the following:
- Select the Terminating Addresses radio button if you want to change where your toll‑free calls are routed to.
- Select the Linked To feature radio button if you want to link the terminating routing type to an existing feature.
- Select the Terminating Addresses radio button if you want to change where your toll‑free calls are routed to.
- In the Terminating Routing Type section, do one of the following:
- To use a dedicated termination, select the DED radio button.
- To use a switched termination, select the SWI radio button.
- To use a dedicated termination, select the DED radio button.
- Then do one of the following:
- Select the OverFlow radio button if you want to send any overflow calls to another route for when the trunk group is busy or down.
- Select the Add BRNA radio button for busy ring no answer if you want to set up another route when the condition of busy ring no answer exists. You can transfer calls when the trunk group is down, busy, or there is no answer after a given time (you select the time in seconds).
- Select the None radio button if you do not want overflow or BRNA.
- Select the OverFlow radio button if you want to send any overflow calls to another route for when the trunk group is busy or down.
- Scroll down, in the Routing Criteria section, do one of the following:
- To create a route on the area code, area code and prefix (first 6 digits), or 10‑digit number. select the NPANXX radio button, then type the corresponding area codes.
- To add all the area codes by state or province. select the State radio button, then select the state or province from the list you want the number to terminate to, then click Retrieve NPA. Afterword, you can add additional area codes or remove any of them.
- To route by LATA (a geographical area used by telecom companies), select the LATA radio button, then select the LATA from the list.
- To create a route on the area code, area code and prefix (first 6 digits), or 10‑digit number. select the NPANXX radio button, then type the corresponding area codes.
- Click Update.
- Click Save Changes (you may need to scroll down in the window).
- Select the date and time you want your changes to take effect, then click Submit.
Important: After you schedule the changes, you cannot edit the plan until the pending changes are activated. You can check the status of the request by selecting Job List from the More Actions list.


