Creating a custom detail usage report
If you want to limit the details in a report or to display data beyond what a standard detail usage report delivers, then you can create a custom detail usage report in Lumen Connect®. You can create a new custom detail report from scratch or clone and customize an existing report. Choose what data to include and how you want the data sorted in your report. If you need to parse the data in the report, you can also create a hierarchy to align the usage data to your organization's structure. As needed, you can also edit or delete a custom voice usage report.
Need to understand high‑level usage trends? View a standard summary usage report or create a custom summary usage report.)
To create a custom detail usage report:
- Using the left menu, click Monitoring, click Voice Reports, then click Usage Reports.
Lumen Connect shows a list of usage reports for your organization.
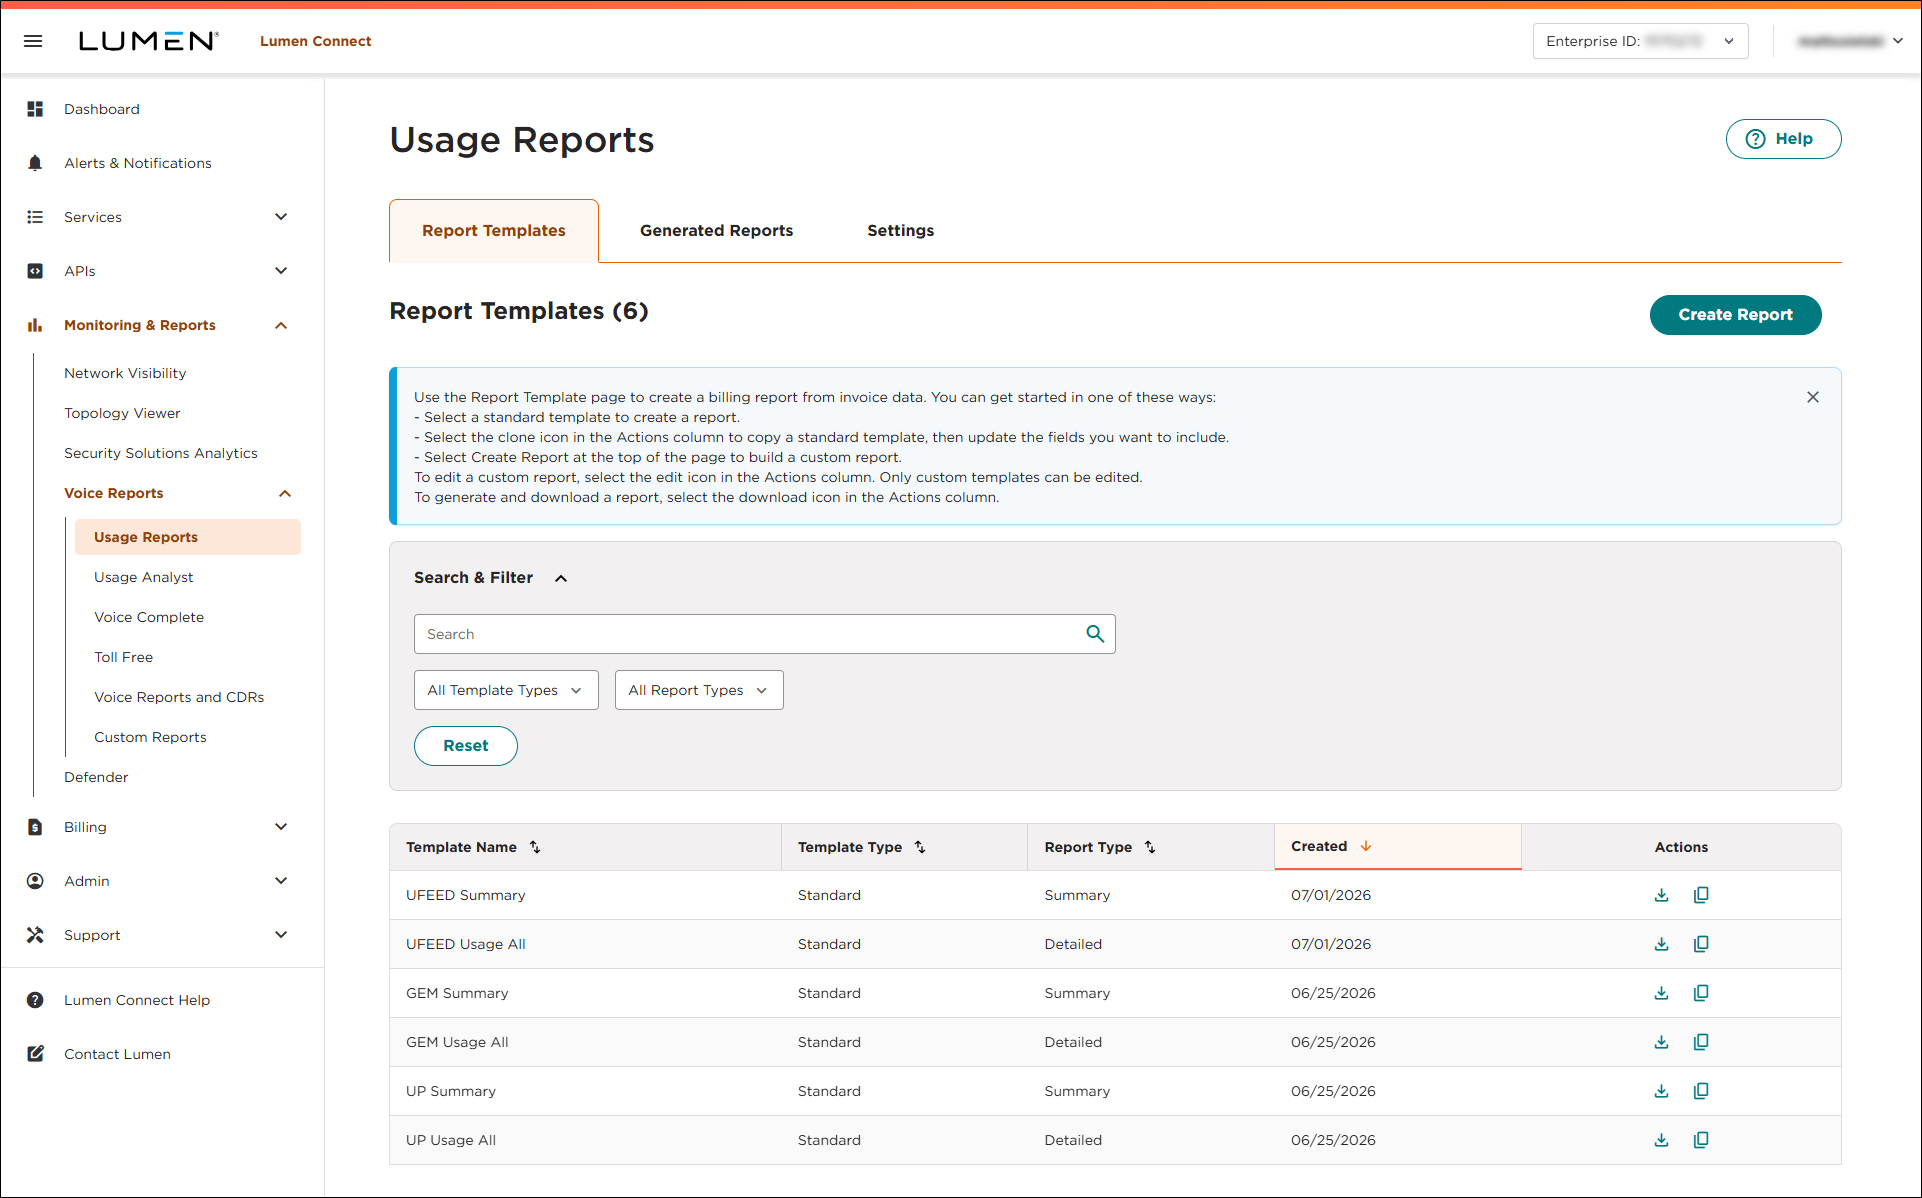
- You can create a custom detail usage report from scratch or by cloning and adjusting an existing report:
- Type a name for the report.
- In the Summary or Detailed Report field, select the Detailed radio button.
- Use the Category Type and Sub Category Type lists to select the type of report you want to create.
- Click Continue.
- In the Columns section, Lumen Connect shows the excluded and included fields for the report. Use the sections to select the data you want the report to include and the order you want the data to appear in:
- To include all fields, select the Include All Columns checkbox.
- To add fields to the report, click to highlight fields in the Excluded Fields section, then click the button.
- To remove fields from the report, click to highlight fields in the Included Fields section, then click the button.
- To change the order of the fields, use the
drag_indicator icon in the box for the field to drag it to a different position.
- To add a sort preference to a field, click the
more_vert icon in the box for the field, then click Sort ascending or Sort descending.
- To remove a sort preferences from a field, click the
more_vert icon in the box for the field, then click No sorting.
- To include all fields, select the Include All Columns checkbox.
- Click Save and Generate. (To run the report later, click Save.)
- Use the filter options to specify the data, structure, and frequency for the report:
- Select the customer number you want the report to include.
- In the Scope field, select what data you want the report to include:
- To include all billing accounts under the customer number, select All Accounts.
- To specify billing accounts to include, select Specific Accounts, use the Accounts Selection field to select the checkbox next to billing accounts you want to include, then click Apply.
- To use a hierarchy, select Hierarchy, then select an option from the Hierarchies list.
- To specify services to include, select Services, click Select Services, then use the window that appears to search for and select the services you want to include. When you're done, click Save.
- To include all billing accounts under the customer number, select All Accounts.
- In the Report Frequency field, select whether you want to view a one-time or recurring report:
- To create a one-time report, select Once, then use the Month Selection field to select the month you want to view a report for.
- To create a recurring report, select Monthly, use the Frequency Month field to select data for the current month or the previous month, then select the day of the month you want the report to run. (For example, you could set up the report to run monthly on the first of the month and to have the report show data for the previous month.)
- To create a one-time report, select Once, then use the Month Selection field to select the month you want to view a report for.
- In the Download File Type field, select the radio button for the type of file you want to use for the report.
- Select the customer number you want the report to include.
- Click Generate.
Lumen Connect creates the report and shows the Generated Reports tab. When the Generating label disappears, the report is ready for you to download. Lumen Connect stores reports for 15 days from the day they're created.
- Type a name for the report.
- In the Columns section, Lumen Connect shows the excluded and included fields for the report. Use the sections to select the data you want the report to include and the order you want the data to appear in:
- To include all fields, select the Include All Columns checkbox.
- To add fields to the report, click to highlight fields in the Excluded Fields section, then click the button.
- To remove fields from the report, click to highlight fields in the Included Fields section, then click the button.
- To change the order of the fields, use the
drag_indicator icon in the box for the field to drag it to a different position.
- To add a sort preference to a field, click the
more_vert icon in the box for the field, then click Sort ascending or Sort descending.
- To remove a sort preferences from a field, click the
more_vert icon in the box for the field, then click No sorting.
- To include all fields, select the Include All Columns checkbox.
- Click Save and Generate. (To run the report later, click Save.)
- Use the filter options to specify the data, structure, and frequency for the report:
- Select the customer number you want the report to include.
- In the Scope field, select what data you want the report to include:
- To include all billing accounts under the customer number, select All Accounts.
- To specify billing accounts to include, select Specific Accounts, use the Accounts Selection field to select the checkbox next to billing accounts you want to include, then click Apply.
- To use a hierarchy, select Hierarchy, then select an option from the Hierarchies list.
- To specify services to include, select Services, click Select Services, then use the window that appears to search for and select the services you want to include. When you're done, click Save.
- To include all billing accounts under the customer number, select All Accounts.
- In the Report Frequency field, select whether you want to view a one-time or recurring report:
- To create a one-time report, select Once, then use the Month Selection field to select the month you want to view a report for.
- To create a recurring report, select Monthly, use the Frequency Month field to select data for the current month or the previous month, then select the day of the month you want the report to run. (For example, you could set up the report to run monthly on the first of the month and to have the report show data for the previous month.)
- To create a one-time report, select Once, then use the Month Selection field to select the month you want to view a report for.
- In the Download File Type field, select the radio button for the type of file you want to use for the report.
- Select the customer number you want the report to include.
- Click Generate.
Lumen Connect creates the report and shows the Generated Reports tab. When the Generating label disappears, the report is ready for you to download. Lumen Connect stores reports for 15 days from the day they're created.
- To download the report, click the
download icon. (Once you download the report, you can delete it by clicking thedelete icon.)



